background

Thursday, July 26, 2012

Guest bathroom - Done!

Hello everyone!  I know I said I would have the final product posted yesterday, BUT I had a little emergency with my wee little Lola & was taken away from the project for a bit.  Don't worry, she is fine :)

We finished up the bathroom this morning.  We were all done with the painting by Tuesday night but Scott had to install the new white shelves above the toilet and install the little towel ring by the sink.  We are still waiting to get the light fixture installed and that will be done tomorrow.  But I wanted to go ahead and show you the finished product.

Let's start out by looking at why my inspiration was.


This is the rug I found at Home Goods awhile back and this is in front of the vanity & then I have a smaller one in the tub/toilet area.  I love the way the blocks are placed and all the shades of purple with a little bit of gray.  Our dining room is a lot similar to this with the grays and the purples (not lavender walls).

Let's take a quick look at the before's:


So without further ado, here is the bathroom! :)


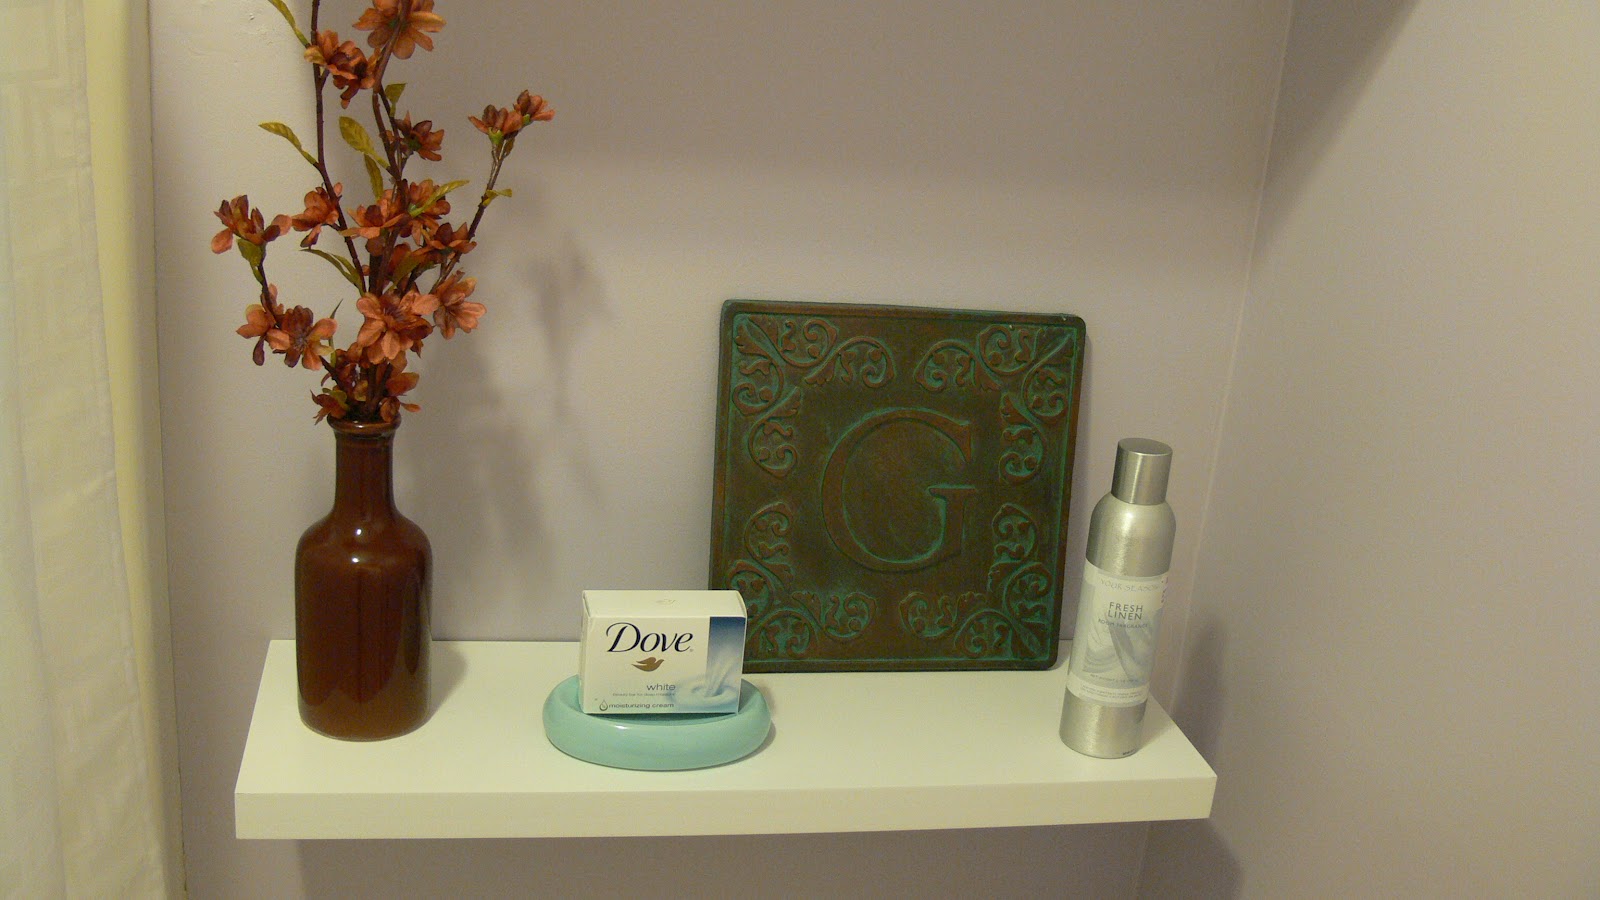
I added some personal touches in the room with two large pictures of my babies bathing (get it? We're in a bathroom?) :) I have a teeny little frame on the top shelf above the toilet of Scott & I when we were about 19 & 21.  I know, we look super young.  I will most likely change that picture and put something more "bathroom" in it, but we'll see.  Let me explain what I have on the counter top.  On the far left is a tumbler of Q-Tips & then right next to it is a little jar of cotton balls and little make-up remover puff thingys.  Then soap, then a tumbler of some sort that holds Liam's toothbrush & tooth paste & of course when we have guests, they can utilize it as well.  Then on the far right is a reed diffuser because let's face it...I have a little boy & little boys tend to smell after playing outside.  :)

The painting on the far right wall is something I bought yeeeeeeeeaaarrsss ago but never parted with.  I wanted to incorporate some browns & grays in the room to balance out the purple & not make it look to "feminine".

Well I hope you enjoy the room & once we get the light fixture installed I will post a new picture of the vanity area.  Have a good night!

~Kristine

Tuesday, July 24, 2012

Green Goddess Grilled Cheese - A Pinterest Recipe

I wanted to share with you guys an amazing recipe I tried last night.  It's a creative turn on a typical, boring grilled cheese & a lot better for you!  Scott & I normally don't eat meat (especially red meat) but we will have our occasional chicken & ground turkey.  But my goal this last week was to make a dinner every night with no meat, all veggies.  And I succeeded and made some awesome dinners, including this one.  The green goddess grilled cheese.  I have seen this recipe a lot on Pinterest so I decided to try it.  I found the recipe here.

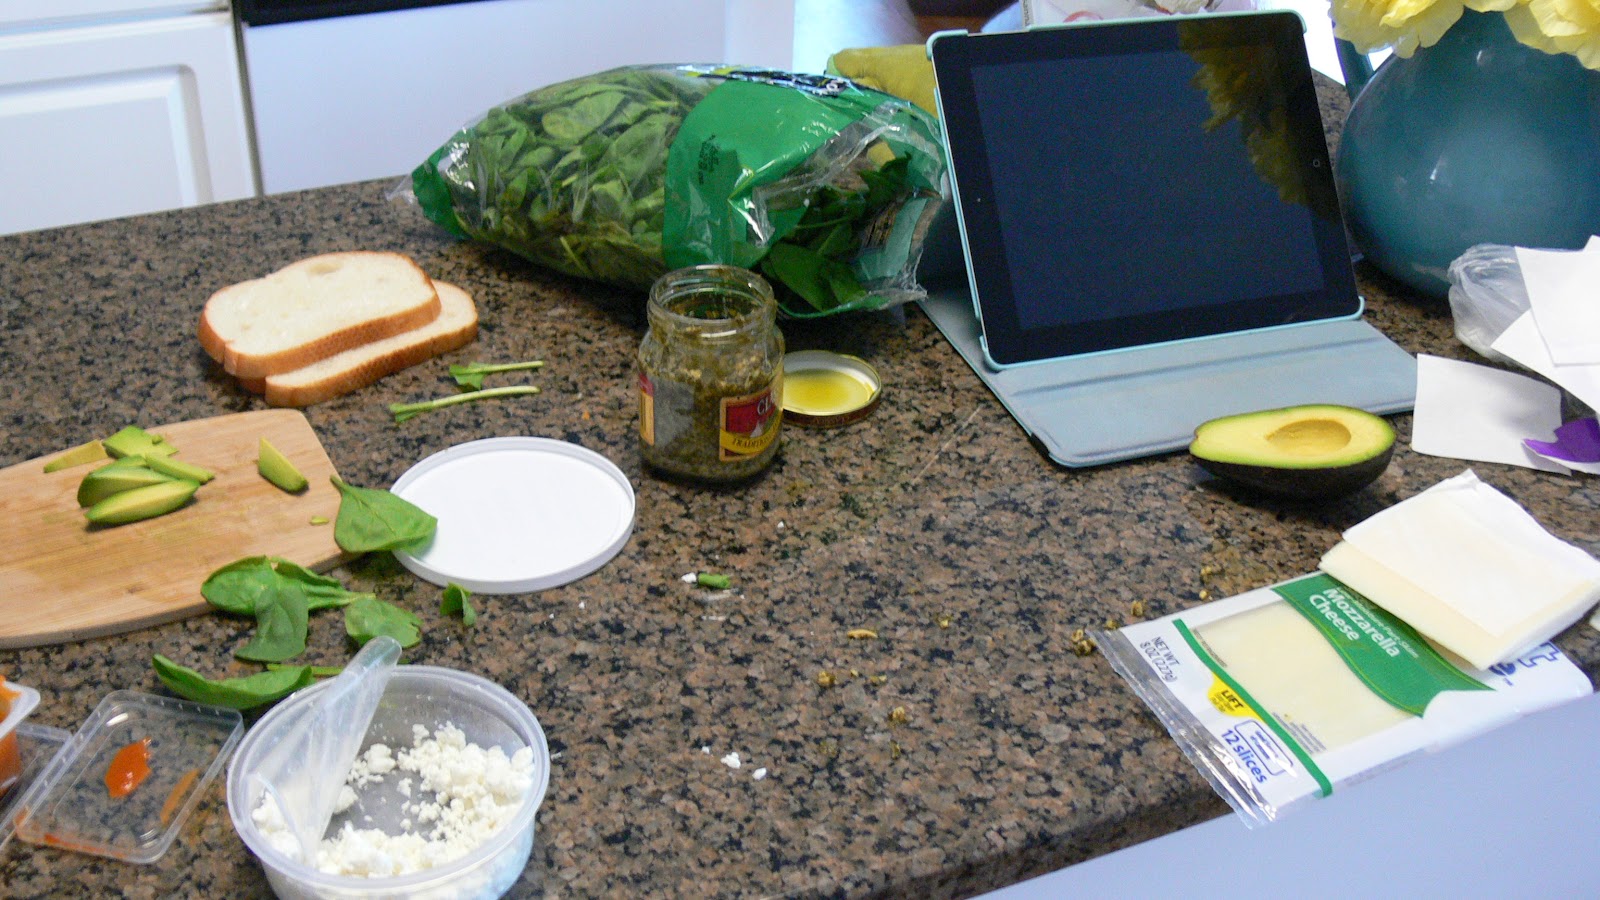
Let's first look at the mess I made...Yes, I am a messy cook.

 
These are the ingredients that you will need: *This is to make one sandwich*

- 2 slices of bread (preferably a multi grain bread)
- Pesto (the link I attached has a recipe to make your own pesto. I bought mine)
- 2 slices of mozzarella cheese
- Crumbled goat cheese
- Baby spinach
- Slices of avocado

Pour a little olive oil in the skillet.  Spread the pesto on each slice of bread.  Place one piece of mozzarella cheese on the bread, then add the avocado on top.  Put some goat cheese on next, then add some spinach and top it off with another slice of mozzarella cheese.  Then place the other piece of bread on top and press down.  Put the sandwich on the skillet and let it brown, then flip it over and press down and let that side brown.  Take it off and cut in half (if you so choose) :)


YUM!  Look at all that green goodness.  I didn't know if I would like the goat cheese, but it gives it a creamy taste.  So delicious!  We ate it with some sweet potato fries!


So make this!  It was really easy and it was a crowd pleaser in my house.  We will make this again, for sure!

Oh. P.S.-The bathroom has been painted and now we are putting everything back.  I am hoping to get the photos all taken tomorrow and get it up here so ya'll can see :)

~Kristine

Monday, July 23, 2012

Guest Bathroom Makeover - Part 1

Hello everyone!  I hope everyone had a great weekend!  So sorry for the delay in posts :)  Having a wee little baby & a 3 year old is quite the challenge!  I'm sure a lot of you can understand.

A lot has changed in our home since I last posted.  I will be showing all the new updates within the next couple days.  But the first project I wanted to discuss was our guest bathroom/kids bathroom.  We've left it the exact same since we moved in.  Boring beige walls and all the nasty fixtures.  The ONLY change we made when we moved in was the faucet.  That old 1999 fixture had to go.  So we replaced that ASAP.  But the colors, the $1.00 towel bars and etc was all the same.  Until now.  So the first step - pick a paint color!  I love the shower curtain & the rugs that I have in there already.  I got them at Home Goods a while back & those are staying so I needed to pick a paint color that worked around the rugs.  Well if you didn't know, Sherwin Williams is having their semi-annual paint sale where all their paints & stains are 40% off!!  I know, right?!  Normally, we never go there because quite frankly, I think their paint is a little expensive.  HOWEVER, all their paint is non VOC & has amazing coverage.  So you get what you pay for.  Anyways, we decided to go with a light lavender color from HGTV.  Yes, HGTV has a paint line from SW (Wow, I sound like an endorsement for Sherwin Williams-I swear I'm not). :)  Here is the beautiful color we decided to go with.


Yes, it's the one with the arrows & smiley face & circle.  It's called Grape Mist.  This picture is pretty true to the color.  Well we got down to business this afternoon and started removing everything off the walls & all the crappy $1.00 towel bars & stuff & did some MAJOR spackling.

Yep, I'm getting my spackle on.  Pardon the no make-up :)

This is all pre-sanding, so it looks lumpy.  Don't worry ; I'll sand.
Here are some BEFORE pictures you might enjoy (well, probably not-this wall color is awful).


Ok, now here's the to do list.  I hope to have this all said & done by Wednesday.  We have already done part one.  Tape everywhere & remove everything & spackle.  Painting will come tonight once the babies are in bed.

Guest Bathroom To-Do List:

1.  Remove all hardware, tape & spackle
2.  Paint!
3.  Remove light fixture? (If I can find an inexpensive one at Home Depot)
4.  Get a new towel bar
5.  Hang two white shelves above the toilet (Already own shelves, need to get decorative brackets)
6.  Hang pictures, art, etc.

That should do it!  If anything else, I'll update later.  Stay tune for part two tomorrow!  Have a great night!

Oh, PS-I'm making another Pinterest recipe tonight.  I'll let you know how that goes too.

~Kristine

Sunday, March 25, 2012

A Pinterest Recipe

Hello everyone!

Wow, Sorry it's been so long since I have last posted.  Let me show you why...


Yes, I was having my little baby girl - Lola.  :)  She is such a precious and sweet little baby!  She was born on Sunday, January 29th at 6:48 a.m.  She was little - Only 5lbs 10oz!  And I was full term.  Scary delivery, but I'll chat about that on another post.  She is 8 weeks old today, so here is a more recent picture.


Ok, so enough about my cutie little baby! :)  The point of this post is to talk about a yummy little recipe I saw on Pinterest.  If you don't know what Pinterest is, then you have been living around a rock!  It's such an awesome website and you need to join if you haven't yet!

This recipe is called "No Bake Energy Bites" and I pinned it on Pinterest from this source.  Here are mine and the recipe is below.


Ingredients:

  • 1 cup oatmeal (the old school oats)
  • 1/2 cup chocolate chips
  • 1/2 cup peanut butter
  • 1/2 cup flax seed
  • 1/3 cup honey
  • 1 tsp vanilla
*It says to add coconut flakes, but I chose not to since I hate coconut, but that is something you can add!

Directions:

Mix all ingredients in a bowl and refrigerate for 30 minutes then simply roll into little balls.  Should make around 20 balls or so, depending on how big or small you roll them.  Keep them refrigerated and enjoy!


*Another side note - you don't have to use chocolate chips.  You can substitute those for anything.  Chopped walnuts, almonds or maybe dried cranberries.  Anything you want! :)


I hope you enjoy and try them out!  I have a few other projects up my sleeve that I have been working on and will be sharing very soon!

Kristine

Saturday, December 31, 2011

Dining Room Changes

Merry Christmas & Happy New Years Everyone!  I hope you all had a wonderful Christmas and you're now getting ready for a new year.  I know I am!  I'm getting ready for this baby to come out pretty soon (another month, maybe..).  The Christmas decorations have come down :(  It was sad taking it all down because I just felt like I put them up only a month ago!  Why can't we keep our Christmas decorations up all year round?? :) Just kidding...that would be weird.

So we've actually made quite a few changes around the abode in the past few weeks.  Some big (not really) and some small.  Mostly small.  Like painting the hallway that leads from the dining room to the kitchen, painting the half bath (that needed it so dang bad!!), buying a few new things for the living room and moving some things around, adding some huge, tall mirrors in our entry way on the stairs, and then what this post is about; the dining room.  Nothing major, just wanted to show you how pretty it looks now, now that is more complete. But let's take a look at what it looked like before I re-styled it.


And now here she is in all her glory!


This is what you see when you walk in.  I moved the two end chairs to the corners of the room and would like to get some little pillows for them so they don't look so naked.  I have set the table for four.  Below, you will see the new set up on the table.


The table runner is new and it's from Home Goods.  The gray place mats are also new, also from Home Goods.  The vases are the same and the candle holder in the middle is from Ross I bought over Christmas time.  Now I hope you notice what's in it...Yep! Sparkly, silver ornaments.  They are staying. :)  I think they look so pretty and really go with the room.


I decided to place the holder on top of my Tiffany plate that I got from a dear friend when I got married.  It is just so beautiful, how can you not show it off in a dining room?  I got some new art pieces for the big wall from Kirklands (allllll on sale).


Pretty, huh?  The colors in those pictures go perfectly.  I'm pretty sure it was meant to be.  Oh and because I got them both for $10.99 @ Kirklands.  I just fell in love with the scrolly looking piece.  It totally mimics the scrolls on the rug.  Overall, very satisfied with the big wall.  I have a mirror I bought on Amazon awhile ago that normally hung over our fire place.  Well that mirror was replaced by a MUCH better one (also from Kirklands on sale, more on that on another post). So I decided to stick her in the dining room.


Looks better there, for sure.  Here is another view from the hallway.


Oh, P.S. Those white plates on the place mats are from Target.  They are plastic and only cost $1.79 a piece! I really didn't think it would matter if they were plastic...We aren't really going to eat on them, they just for show!

So those are some changes in the dining room!  Hope you like what we've done.  Like I said, we have some other changes in the house I will show you soon.  Have a great New Year's and see you next year! :)

~Kristine

Thursday, December 8, 2011

Additions to the nursery!

Hey Everyone!

I hope everyone had a wonderful Thanksgiving and I hope everyone has started decorating for Christmas! :)  We put up our tree the day after Thanksgiving and started decorating the house for a few days after that.  I love this time of year, I mean, who doesn't!?  The only thing I could do WITHOUT is the extra traffic, the extra long lines everywhere & the rude people who are not considerate during this time of year..Wow, I sound like Scrooge :) I'm just kidding, that's just what you get at the end of the year. 


To the nursery - We have made some more additions to the room since the last post.  We finally got the glider in (thanks Mommy!) and Scott put that together with the help of Liam, of course.  We got our rug in too!  Both on the same day.  I decided to get a white rug.  I just couldn't find anything that matched what I wanted in my head!  So white it was and I am so glad- it looks so pretty with the pinks and the gray and the white furniture.  We got the bumper and the sheet for the bed because remember, I am making the crib skirt.  I will have a post about that soon.  I need to finish making it!  I know-this is a busy time of year, people! The more I look at the curtains, I just love them even more! Here are a few pictures of what we have so far.  Oh, we also hung up the awesome mirror too. 

Liam helping his Dad
Ummmm...Be-still my heart! Look at them! :)
Here she is in all her glory

The bumper in the crib, just not "hooked" up yet

The new rug! Perfect size for this room. Pretty much fits the entire walking space so you're always standing on soft, cushy-ness. :)
So that's where we are right now.  I still have a few things I was going to paint and hang up and I still can't decide what to put on one wall.  I'm thinking some nice long white shelves - You can never go wrong with shelves.  We'll see, still deciding.  I hope y'all like the additions to the nursery!  Crib skirt to come and some wall accessories.  So, to be continued!

Have a great day and an upcoming weekend!  Get some Christmas shopping done! :)

~Kristine